Make Siri Control Your TP-Link Kasa Smart Devices
I'm Kenneth and I am software engineer. Here to share my experiences to the world and to learn from everyone as well.

I’ve had a couple of TP-Link Kasa Smart Light Bulbs for the past 2 years. Configured them to be controlled by Google Home and I’ve been lazy to turn our lights on using a switch since then! This has been the setup for 2 years but last week, I wondered if there’s a way for my iPhone to natively support controlling these smart light bulbs
A little bit of research here and there and officially, iOS cannot natively support this. Then I found out that if there’s a will, there’s a way! It turns out I can achieve this by combining the powers of IFTTT and iOS Shortcuts. Here’s how I did it.
IFTTT
My goal here was to create an applet that exposed a Webhook as its trigger. The main action in this applet will then be to integrate with the TP-Link Kasa service to control my light bulb. Let’s go through the steps to achieve this.
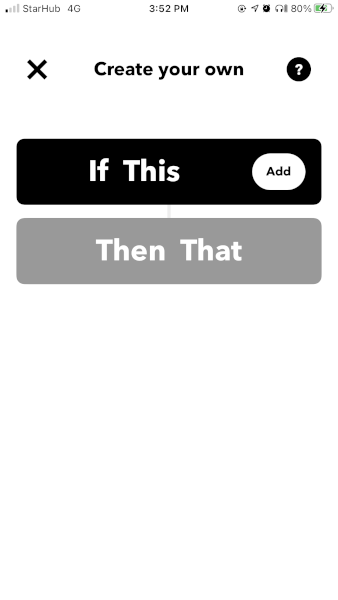
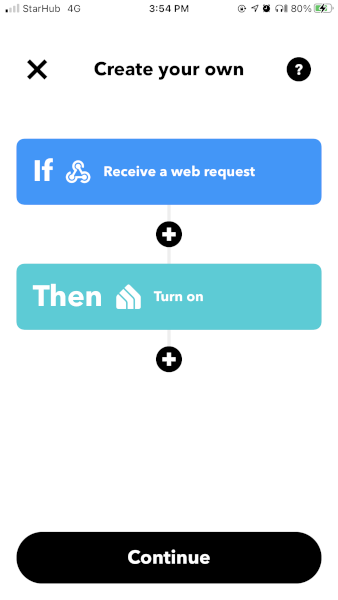
I started creating a new applet.
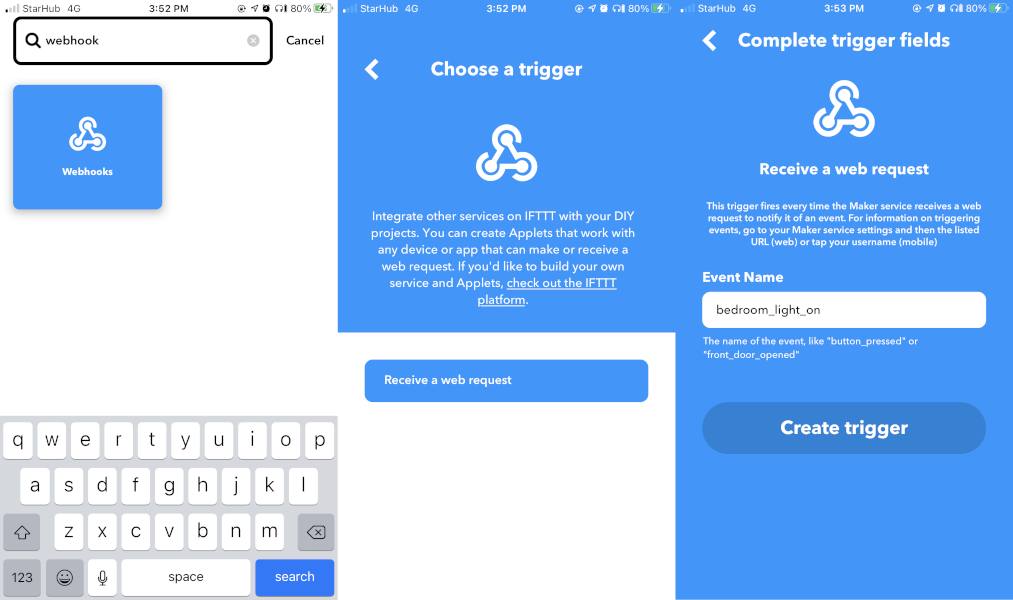
For the If This panel, I used the Webhooks service and configured it to listen to the event “bedroom_light_on”.
For the Then That panel, I used the TP-Link Kasa service and chose the Turn on action.
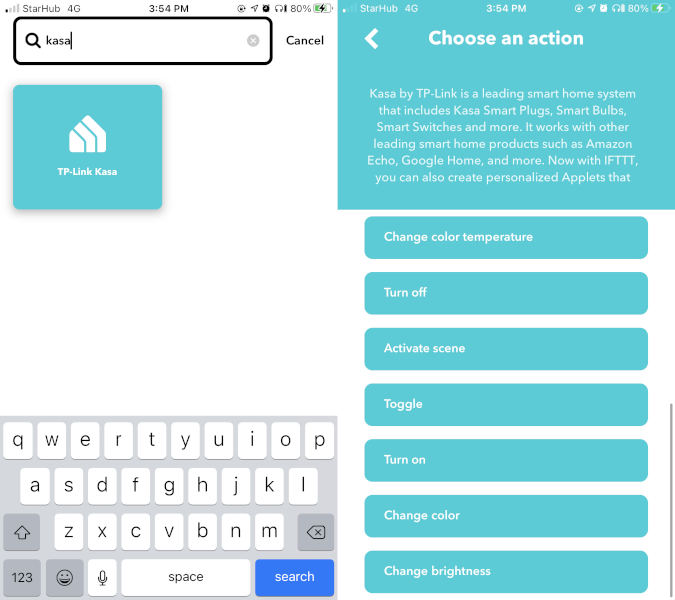
Since this was the first time I used this service, IFTTT asked me to authorize the integration with my TP-Link Kasa account. I just keyed in my Kasa account credentials and it’s good to go.
![]https://cdn.hashnode.com/res/hashnode/image/upload/v1630176555887/LgLxGeDWj.png)
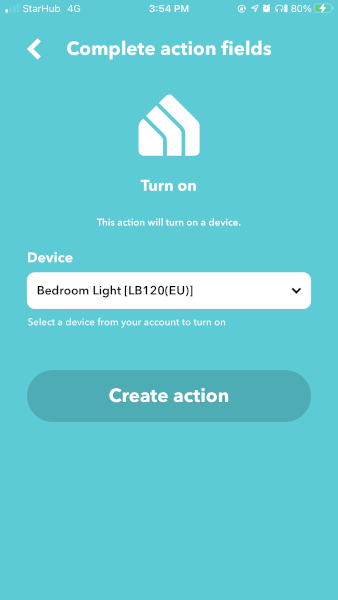
Once the integration has been authorized, I was now able to select which device will be turned on by this applet.
This is how my applet looks like at this stage.
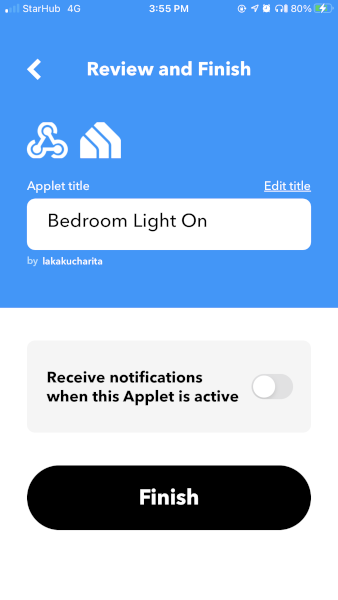
I clicked Continue then specified the Applet title. After which, I clicked on Finish.
That’s it! I now have an applet that can be triggered to turn my smart light bulb on. I also created an applet to turn off the light bulb by just repeating the above steps. Only difference is I changed the Webhook event name and the TP-Link Kasa action accordingly. If you’re an IFTTT Pro user, then you can further condense all of these into a single applet using the more advanced features available to you.
Now, we’re ready for the steps on the iOS Shortcuts side. Not yet. There’s still one last step left to complete the configuration on the IFTTT side — to identify the Webhook URL for this applet. This URL will be used by iOS Shortcut to trigger this IFTTT applet. More on that later.
Here’s how I identified the Webhook URL:
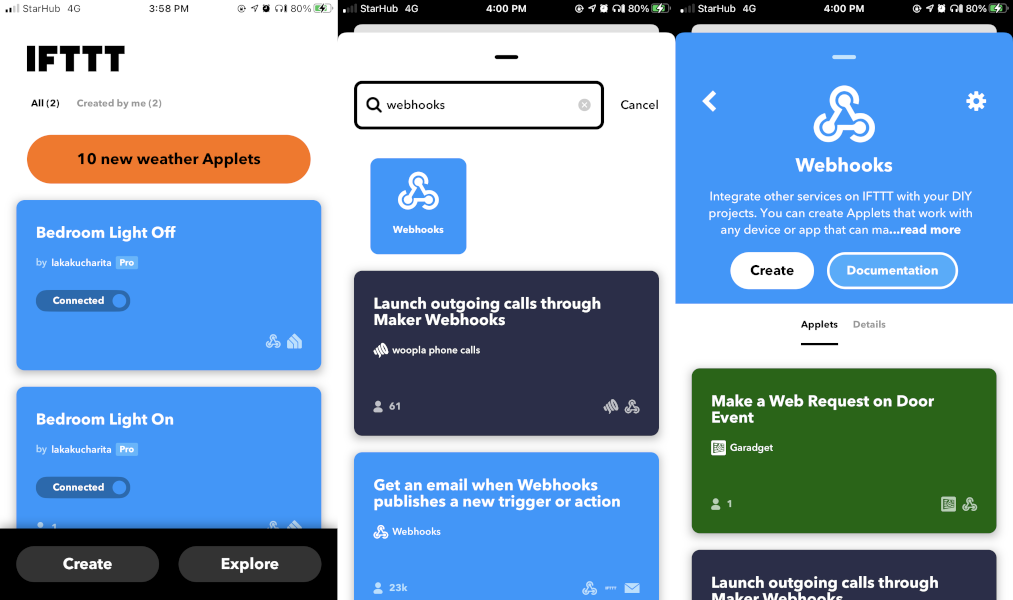
On my IFTTT dashboard, I clicked on Explore.
I searched for the Webhooks service then clicked on the Documentation button.
I was brought to the documentation page where my API key was indicated. Additionally, the URL to trigger my webhook events is also indicated here.
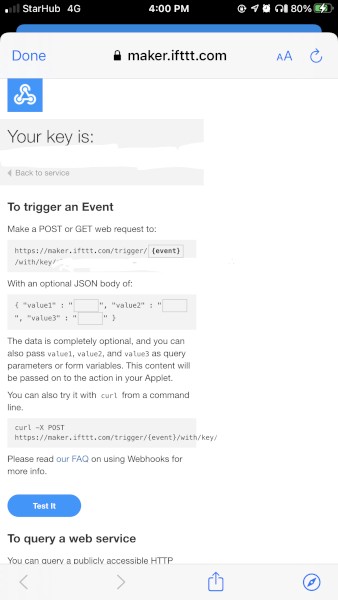
I replaced the {event} part of the URL to match the event names I specified when I created the on and off applets.
Now that I had the Webhook URLs (one for each event), I set it aside first and went on to configure the iOS shortcuts on my phone.
iOS Shortcuts
At this point, I now need to configure iOS to integrate with the IFTTT applets I created earlier. More specifically, I need iOS to be able to trigger the Webhook events I defined. It’s quite simple. I literally created 2 shortcuts that each calls the 2 Webhook URLs I set aside earlier.
I defined the shortcuts by doing these steps:
I created 2 new iOS Shortcuts
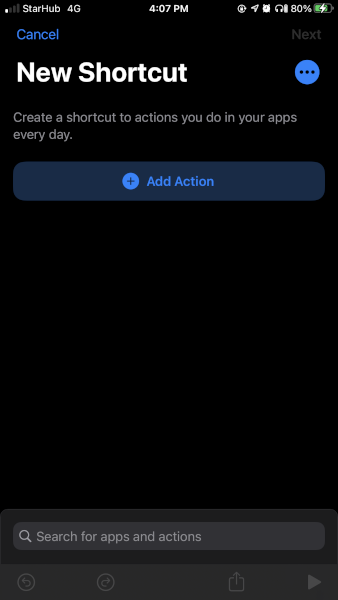
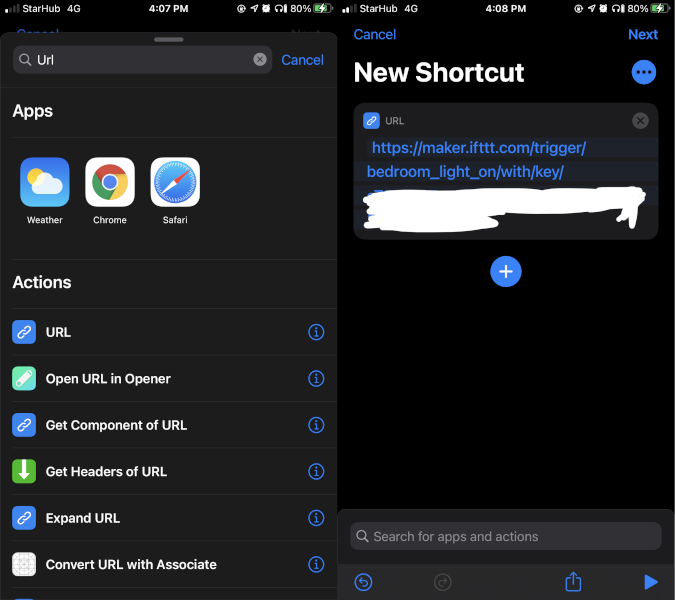
I added the URL action and defined it to contain the Webhook URL set aside earlier. One defined with the Webhook URL for the “turn on” applet and the other with the Webhook URL for the “turn off” applet.
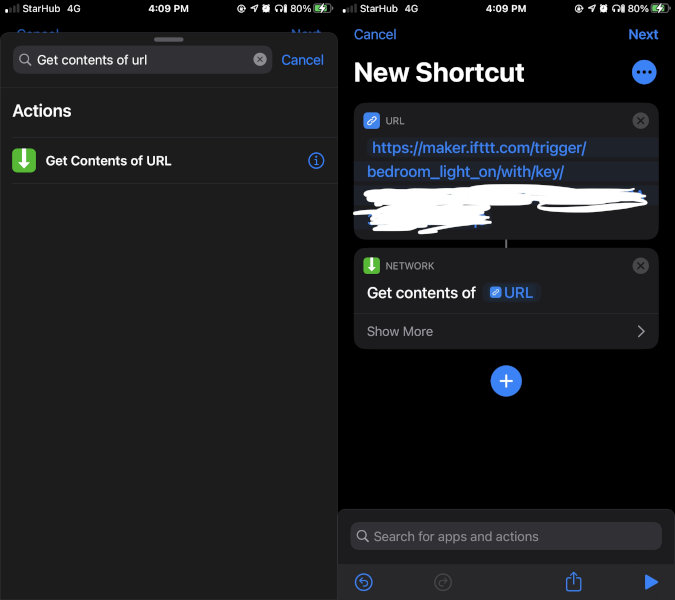
I then added the Get Contents of URL action. By default, this will automatically use the URL defined in Step 2.
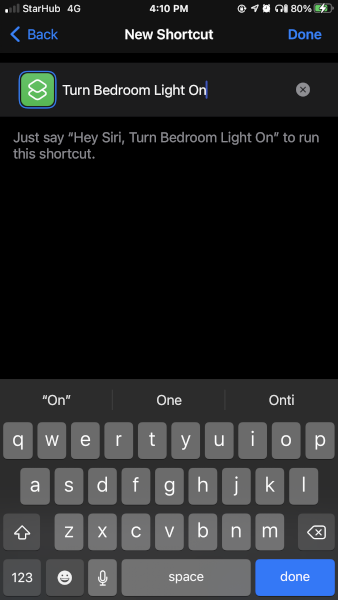
I clicked on the Next button at the top right and then specified the name for the shortcuts.
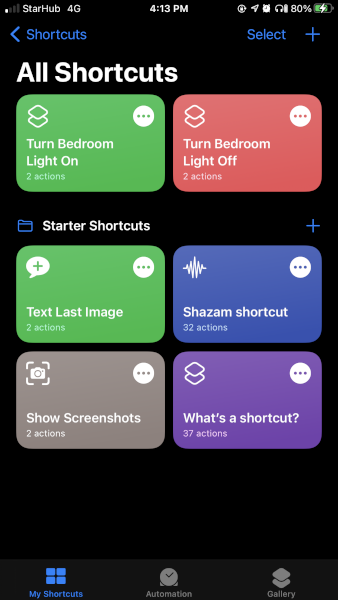
At the end, I had the ff. shortcuts created:
Testing It Out
Now that I had the iOS shortcuts and IFTTT applets set up, I can just go and activate any of the turn on/off shortcuts by simply talking to Siri. In my case, my shortcuts are named “Turn Bedroom Light On” and “Turn Bedroom Light Off” respectively. I can just say “Hey Siri, please turn the bedroom light on.” and Siri will automatically identify the correct shortcut to activate.
Now, even if my Google Home can’t hear me, I can still control my bedroom light hands-free just by using my phone!


