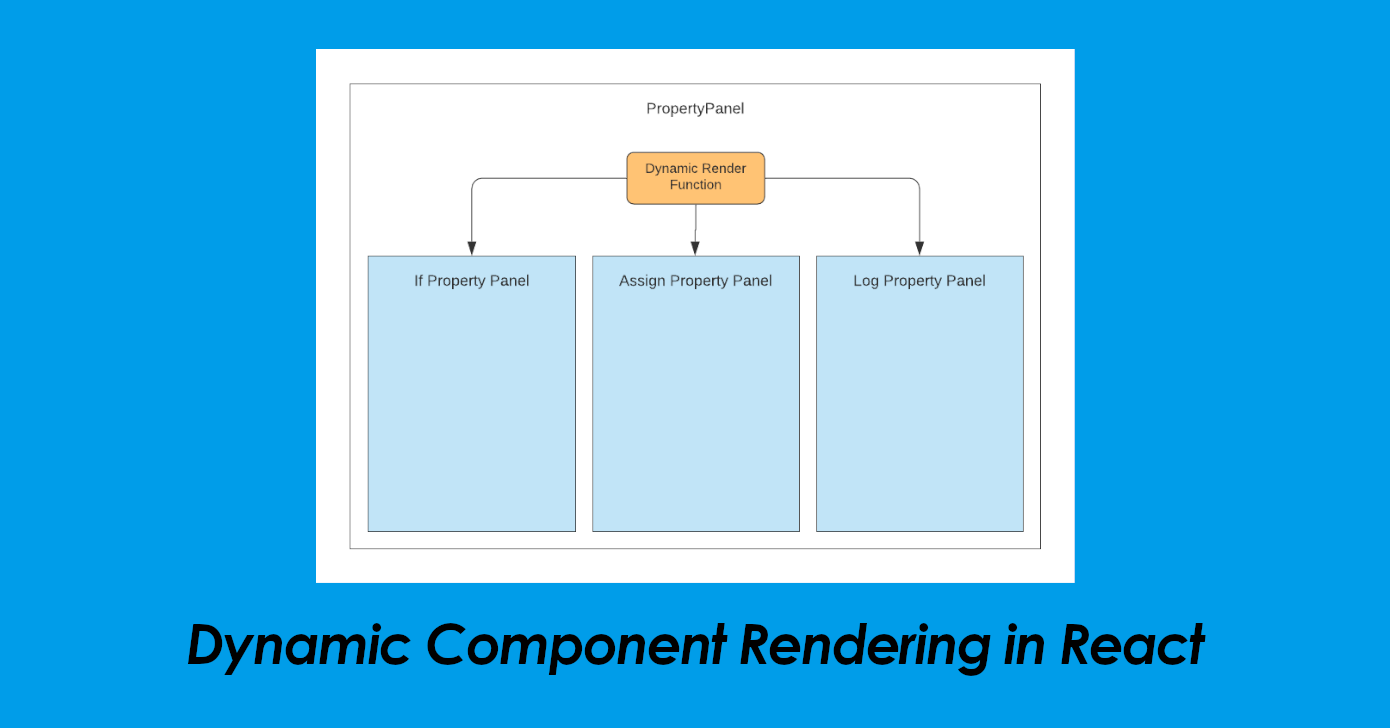
Dynamic Component Rendering in React
I'm Kenneth and I am software engineer. Here to share my experiences to the world and to learn from everyone as well.
When defining application components, a good strategy is to split by functionality.
In a blogging application, we'll have a component to represent the WYSIWYG editor then, another to hold the publish settings. In this particular example, the publish settings component is pretty static. Meaning, it will always have the same fields and behavior.
But, what if the publish settings contents vary dynamically? A good example of this can be found in Photoshop. In this case, depending on the tool selected, the Property Panel will be rendered differently.
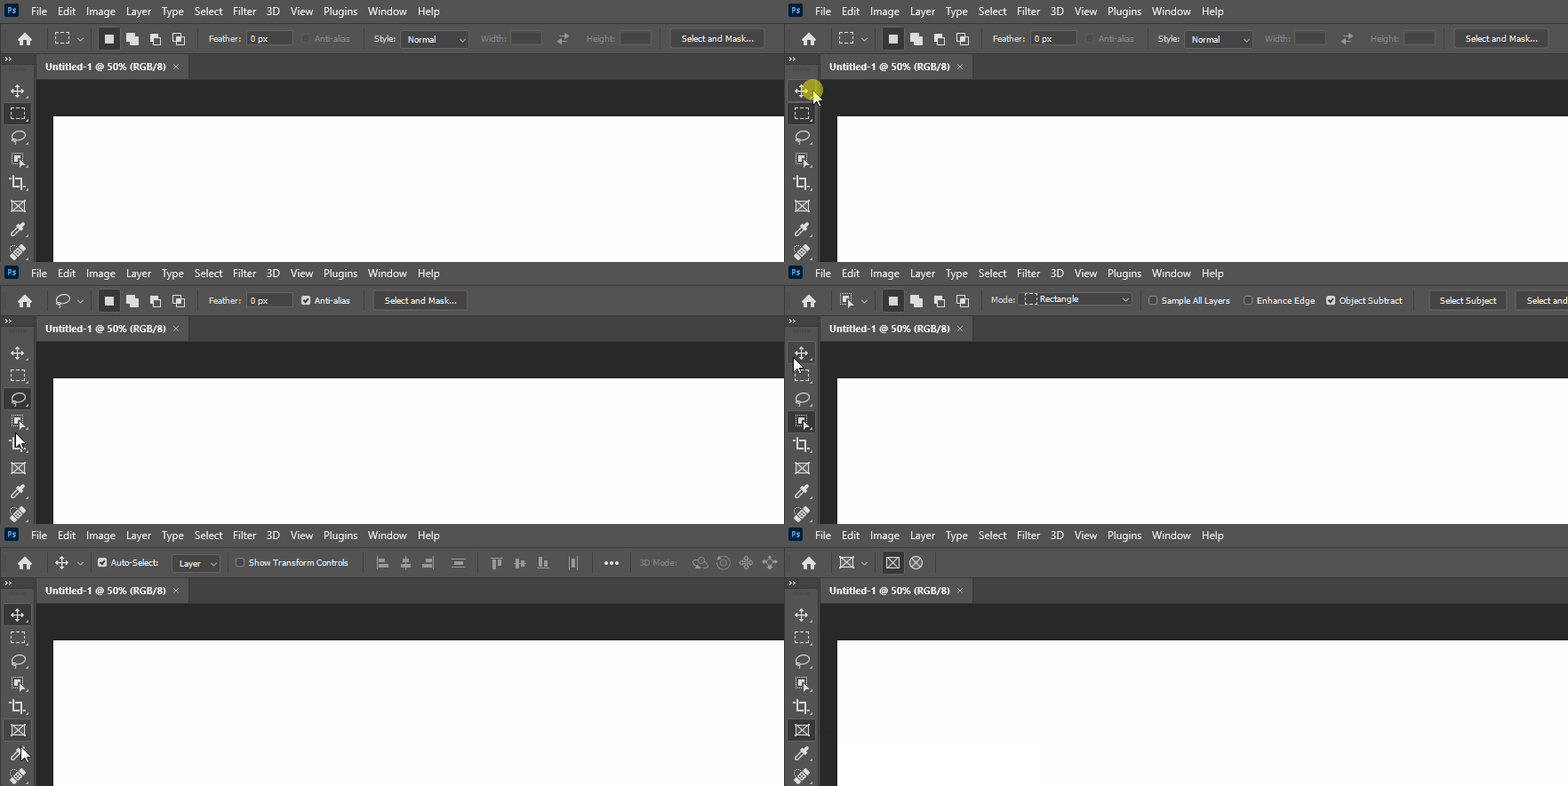
This is where dynamic component rendering comes in. When a tool is selected, Photoshop will intelligently determine what will be rendered on the property pane.
In this post, let's explore how to implement dynamic component rendering in React.
Let's go!
The Design
In this section, we'll talk about what makes up a dynamic component rendering implementation.
There are 3 items we need to prepare:
- Configuration - In its most basic form, the configuration is simply a mapping between a condition and a component.
- Dynamic Components - Of course, we'd need to have the components that will actually be dynamically rendered.
- Dynamic Render Function - This is the function that will actually perform the decision of which component to render.
Next, we'll look at dynamic component rendering in action.
The Implementation
For our example, we'll look at a Property Editor component whose contents can be dynamically changed based on user selection.
We'll configure each of the 3 items mentioned in the previous section. Let's start.
Configuration
For the configuration, we'll implement a basic mapping between a key and a functional component to represent that key:
const Config = {
  assign: AssignPropertyEditor,
  log: LogPropertyEditor
}
Based on this configuration, our dynamic component renderer will have 2 different components to choose from.
Dynamic Components
For the dynamic components, we implement them as if they're normal components.
The AssignPropertyEditor component looks like this:
const AssignPropertyEditor = ({ codeData, updateData }) => {
const type = codeData.type;
const localData = codeData.data;
if (type === "assign") {
const onVariableChange = (event) => {
localData.variable = event.target.value;
updateData(localData);
};
const onValueChange = (event) => {
localData.value = event.target.value;
updateData(localData);
};
return (
<div>
<strong>Assign:</strong><br/>
<input name="assign_var" type="text" defaultValue={localData.variable} placeholder="Variable" onChange={onVariableChange} />
=
<input name="assign_val" type="text" defaultValue={localData.value} placeholder="Value" onChange={onValueChange} />
</div>
);
}
return null;
};
While the LogPropertyEditor looks like this:
const LogPropertyEditor = ({ codeData, updateData }) => {
    const type = codeData.type;
    const localData = codeData.data;

    if (type === "log") {
        const onMessageChange = (event) => {
            localData.message = event.target.value;

            updateData(localData);
        };

        return (
            <div>
                <strong>Log:</strong><br />
                <input name="log_message" type="text" defaultValue={localData.message} placeholder="Message" onChange={onMessageChange} />
            </div>
        );
    }

    return null;
};
The only pattern we need to be aware of is that both components should receive the same set of properties. Of course, they should use these properties in the same way.
In our example, the codeData will hold the data for each component. Then, the updateData property is a callback function which the dynamic components will execute when their respective data has changed.
Dynamic Render Function
For better context, we'll show the render function as included in its entire component:
function App() {
  const [activeData, setActiveData] = useState();

  const onUpdateCodeData = (data) => {
    // react to data update from dynamic components
  };

  const renderPropertyEditor = () => {
    if (activeData && activeData.type !== null && Config[activeData.type]) {
      const PropertyEditor = Config[activeData.type];
      return (<PropertyEditor codeData={activeData} updateData={onUpdateCodeData} />);
    } else {
      return (<em>Select an element type to display.</em>);
    }
  };

  const onDisplayAssignEditor = () => {
    setActiveData({ type: "assign", data: { variable: "a", value: "100" } });
  };

  const onDisplayLogEditor = () => {
    setActiveData({ type: "log", data: { message: "hello world!" } });
  };

  return (
    <div>
      <div>
        <h1>Toolbox</h1>
        <ul>
          <li><button onClick={onDisplayAssignEditor}>Update to ASSIGN</button></li>
          <li><button onClick={onDisplayLogEditor}>Update to LOG</button></li>
        </ul>
      </div>
      <div>
        <h1>Property Editor</h1>
        {renderPropertyEditor()}
      </div>
    </div >
  );
}
The dynamic render function is the renderPropertyEditor function. It uses the activeData variable to determine which component to render.
The key code in this function is:
const PropertyEditor = Config[activeData.type];
return (<PropertyEditor codeData={activeData} updateData={onUpdateCodeData} />);
In this section of the code, we literally treat the functional component passed in the configuration as a stand-alone component named PropertyEditor. Whatever component the activeData.type value maps to, will be the one receiving the activeData and onUpdateCodeData properties. This will also be the same component to be rendered.
A More Realistic Example
For a more real-world example, you can check out Speed Build. It's a simple low-code app builder created using React and ReactFlow. Speed Build's code can be found here.
The parent component and the render function can be found at src/Editor/Canvas.js. Additionally, all the dynamic property components are located at the src/PropertyPanel directory.
For more similar projects that can help you learn software/web development, you can check out my DevPinch initiative.
Conclusion
So, that's it! We've implemented dynamic component rendering in react!
Here's a quick demo:
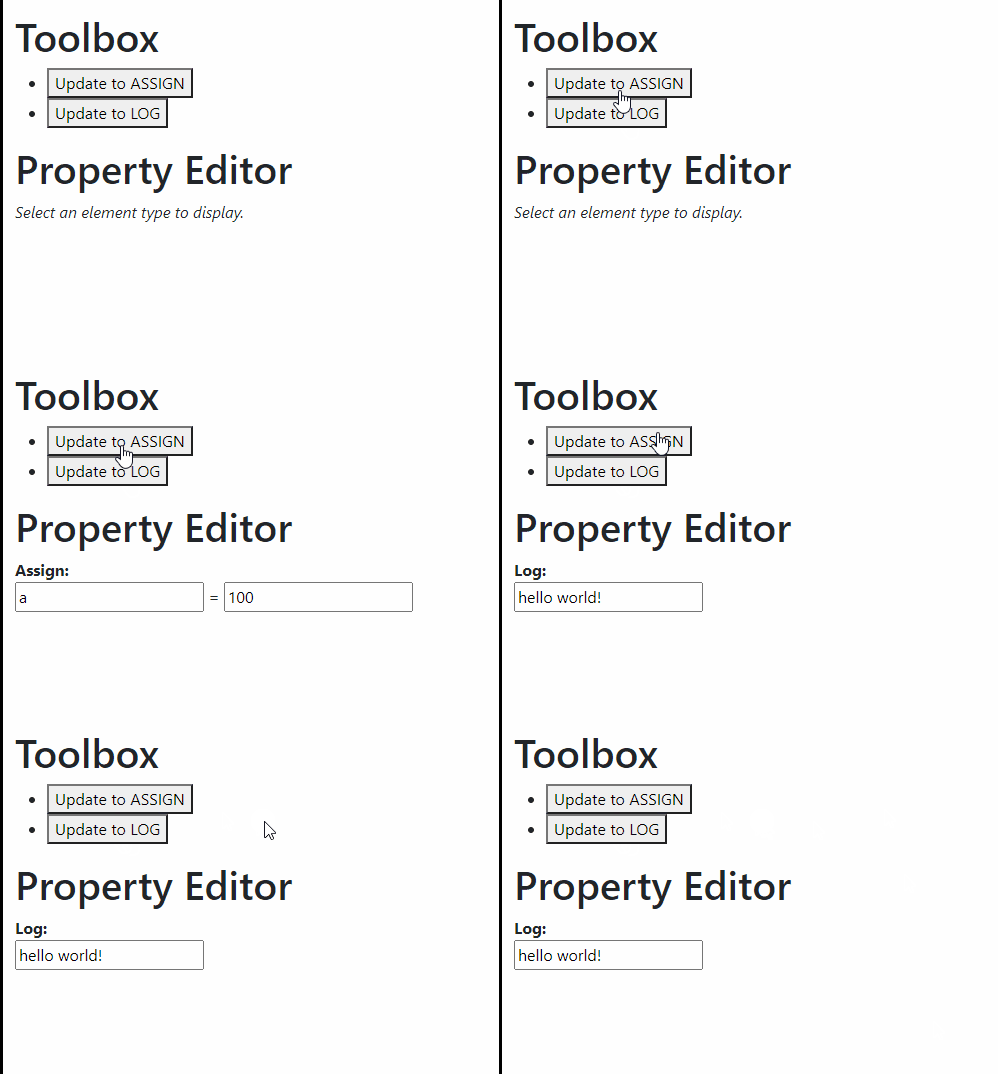
Glad that you've reached the end of this post. Let me know what you think of this approach by sending in your comments.
I hoped you learned something new from me today!
Hey, you! Follow me on Twitter!